Navigate 3D Models with Navisworks
Navigating your scene is easy in Autodesk Navisworks. Navigation tools on the navigation bar, such as pan and zoom, allow you directly manipulate your position in the Scene View. Additionally, you may use Steering-Wheels that follow the cursor, which combines many of the common navigation tools into a single interface for speeding up navigation.
3D Workspace Orientation
Even Though Autodesk Navisworks is configured to use the X, Y, Z coordinate system, there is no universal rule that dictates where the axes point. Directly from the files loaded into your scene, Autodesk Navisworks reads the data necessary to map which way is up and which way is north. By default, if this isn't possible, Z is set to up and Y to North.
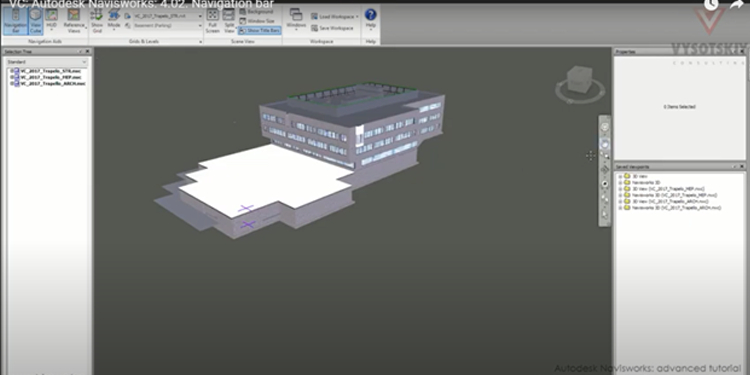
Navigation Toolbar
Navigating the product can be done from both a unified or product-specific navigation bar.
Steering Wheels
Navigate using a single tool and access multiple 2D and 3D navigation tools with the help of the steering wheels.
View Cube
Model orientation visually displays through the Autodesk View Cube navigation tool. Your model's viewpoint can be adjusted using the View Cube tool. In a 2D workspace, the View Cube is not available.
Camera
Navisworks offers multiple predefined settings for controlling the camera position, projection, and orientation.
Reference view
The reference view can be useful for gaining an overall perspective of a scene and for moving the camera quickly to different locations. An interactive 3D workspace provides this capability.
Autodesk Navisworks offers two types of reference views (Section View, Plan View).
Model references show in a fixed view. Section views show how the model looks from the front, while plan views show how it looks from the top.
Dock able windows display reference views. Your current viewpoint represents by a triangular marker. As you move the marker, it reveals the direction in which you are looking. In Scene View, you can drag a marker by clicking and holding the left mouse button over it. Whenever the camera and the reference point are on the same plane, the marker becomes a small dot.
Focus
The Scene View will remain in focus mode until you click again. During focus mode, the camera will swivel toward the point clicked as you click on an item.
- In a 3D workspace, this becomes the point of interest for Orbit tools like Steering Wheels and navigation bars.
- A 2D workspace moves the camera to the center of the focus area while keeping the z value constant.
Hold
You can hold and move around selected items while viewing a model in Navisworks.
For instance, you might be looking at a plant plan and want to see the different configurations of machine layouts.
Collisions
This function identifies you as a collision volume of a 3D object that can interact with the model and navigate around it while following certain physical rules that confine you within it. You cannot pass through any other objects, points, or lines within the scene as a mass.
- The collision volume can be walked over or climbed over to the height of half of an object in the scene, which lets you walk upstairs.
- Collisions enable much higher detail around the camera or avatar since rendering priority has changed.
- The collision volume radius and movement speed determine the size of the region of high detail.
Gravity
Collisions are the only instances where this function uses. Collision gives mass, but gravity gives weight, so walking through a scene pulls the collision volume downward.
The Gravity navigation tool is only available when used with Walk. You can use this feature to walk downstairs, for instance, or follow the terrain.
Crouching
A model might contain objects whose height makes walking over them impossible during collisions, for example, a low pipe that is too high for walking under.
You can crouch under any of these objects using this function. If you crouch down, you can comfortably explore the model without encountering any high objects that you may encounter on your way. The Space bar can press to crouch under low objects temporarily.
Creating a Avatar in 3D Model
You will see yourself represented within the 3D model when you activate Avatar. You will control how the Avatar interacts with the current scene while navigating.
Avatars and collisions are extremely powerful together, with gravity allowing you to visualize exactly how a person will interact with the intended design.
As a global setting or the current viewpoint, you can customize such settings as avatar selection, dimensions, and positioning. Avatars increase the rendering priority of objects surrounding the camera. Sizes of regions of high detail vary greatly depending on the radius of collision volume, the camera's distance, and the speed of movement.
Conclusion
It is possible to walk through scenes in real time with Autodesk Navisworks. You can record and playback viewpoint animations in Autodesk Navisworks as you navigate. You can control the speed and realism of navigation of a 3D model by using the realism tools on the Viewpoint tab, Navigate panel. So, for instance, you can descend stairs, stay on terrain, duck under objects, and use an avatar to represent yourself on the 3D model.